Transfer An Image To Wood With Epoxy
Posted by Rob Errera on 10/22/2020

We want to find the best way to transfer an image from our printer to a piece of wood. We’ve tried several methods in the past, including embedding the image into a latex substrate, and using heat to transfer inks and toner to wood. Our results have been mixed.
But we found an interesting method using epoxy resin which really gives amazing results.

In The Beginning
We began by printing out the Toner Buzz logo (with its coveted 5-star Google rating!) on both our laserjet and inkjet printers. We used standard, 20lb, 92 bright, multi-purpose printer paper for this job. We cut the logos out to fit to the edge of our wooden rectangle.
Then it was time to mix the epoxy resin. We used Z-Poxy by ZAP. We chose the Z-poxy which gave us a long, 15- to 20-minute working time. We mixed equal parts of resin and hardener — a dollop about the size of a quarter each — in a dish, and waited a few minutes for the bubbles to pop.
We slipped on our nitrate gloves. Epoxy doesn’t stick to nitrate gloves the way it does latex.

Image Positioning
We coated the surface of the wood with a thick layer of epoxy then laid our paper image (with the inkjet-printed logo) over top. The epoxy resin soaks through the paper and adheres it to the surface of the wood. The long working time of the Z-poxy allowed us to position the graphic exactly where we wanted it. We wiped off the excess resin and allowed the image to dry overnight.
The next day we did the same thing on the opposite side of the wood, this time with the laserjet-printed logo. We allowed that to dry overnight.
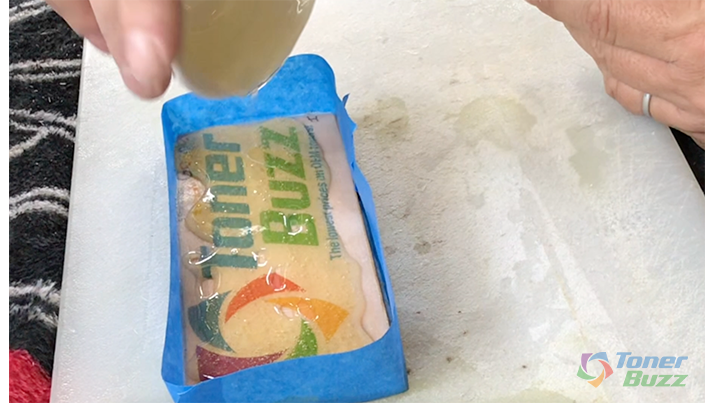
Clear Coating
We wanted to give our project a shiny clear coat, so we mixed up another batch of epoxy resin. We taped off the sides of the wood with painters tape and poured the resin onto the surface of our project. We used a hair dryer to pop any bubbles on the surface of the epoxy and to move the epoxy around. Even though we did our best to keep the project level, the clear coat was definitely thicker on one side of the wood.
We tried for a thinner finish pour on the laserjet side and this turned out better. After letting the resin harden for a day, the surface still looked wavy and there were a few bubbles in the top coat. We sanded the surfaces back with 180- and 220-grit sandpaper. Then we allied a final top coat of epoxy. We want shiny, shiny, shiny!

That Darn Cat!
You know what makes getting a clear shiny finish coat really difficult?
A cat! Even if you can’t see them, cat hairs are everywhere, and they;’ll find their way onto your epoxy project. We must have sanded and resanded this thing five times trying to get rid of errant cat hairs. We finally got a good result after allowing the final coat to dry in our dusty-but-not-highly-trafficked basement.
At long last, the Toner Buzz Five-Star Google Award was complete.


Rob Errera
Rob Errera is an award-winning journalist embedded in the world of printers and printing supplies. Rob has nearly two decades of experience writing about cutting edge technology, business trends, and the ever-evolving industry of printing.