How We Make Custom Guitar Art With Our Samsung Laser Printer
Posted by Rob Errera on 11/02/2018

My son and I started a custom guitar business in 2017, and one of the most important tools in our workshop is our Samsung Xpress Color printer.
My son is 16 years old and has severe autism. Many of his educational goals involve learning a basic skill or trade with an eye toward future employment. There aren’t many jobs for people with special needs—unemployment rates for autistic adults are close to 90%.
I decided to teach my son how to build and repair guitars and basses. I’ve been taking guitars and basses apart and putting them back together since I was a teenager, and I’ve made several instruments for friends and family. It may/will take years, but I think I can teach my son to do the same.
Guitar-building is about precise adjustments, something my son, and other individuals with autism, excel at. It also requires hours of repetitive work—sanding, buffing, polishing—tasks that you or I might find tedious, yet can be calming to special needs individuals. Music. Patience. Mindfulness. Purpose. These are things I want to foster in both myself and my children.
The Big Idea
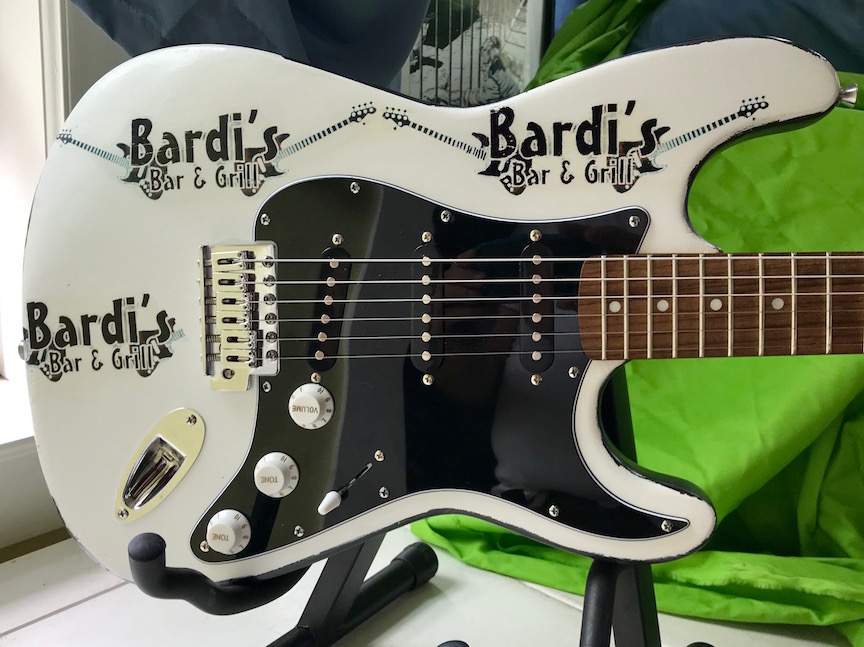
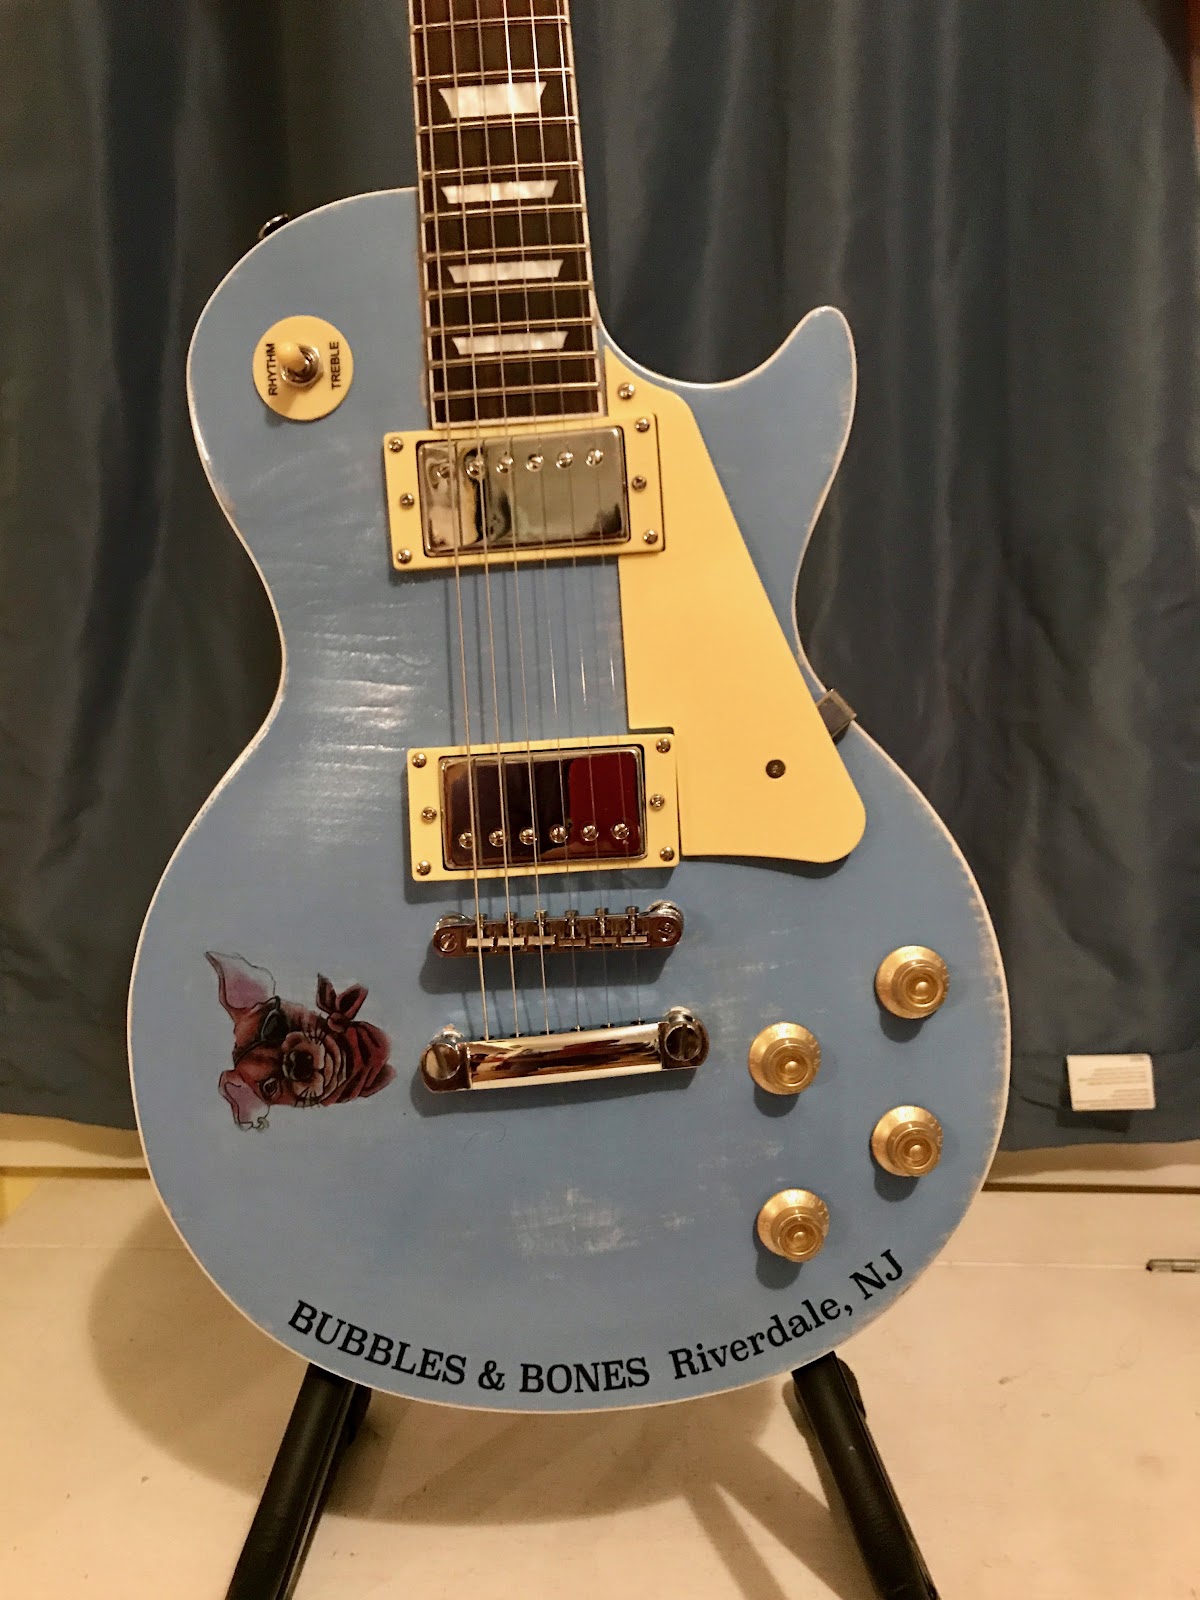
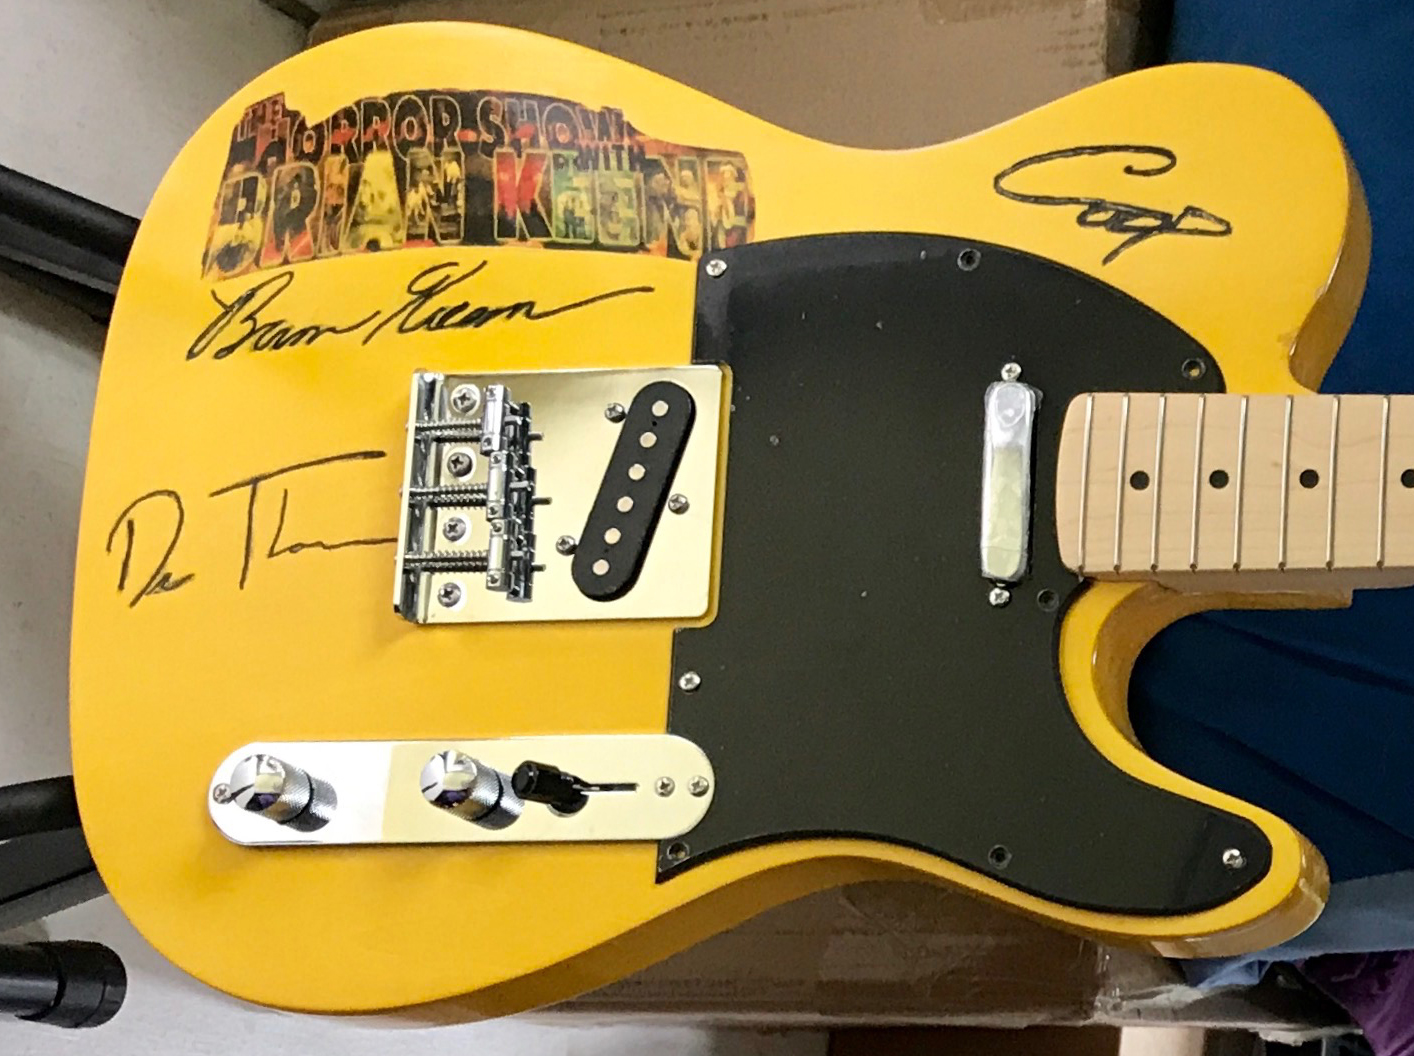
We build simple, yet amazing instruments that are tailor-made for individual players. We incorporate custom, printable artwork to truly personalize our instruments. Signatures, corporate logos, family photos — if you can print it, we can put it on a guitar or bass!
The Basic Process
After a lot of trial and error, we’ve come up with a method for transferring images to wooden guitar bodies that works fairly well.
- Clean the surface where you want to apply the image, and sand lightly with 400-grit or higher sandpaper.
- Find an image you want to use and print it in reverse on standard paper stock. Some printers will allow you to inverse images right on the machine. Otherwise you’ll need some basic image editing software to flip your image horizontally.
- Cut out your image with scissors, trimming as close to the edge of the image as possible.
- Coat the cut-out image with a thin layer of gel medium. (We use Liquitex Gloss, available at most arts and crafts stores.)
- Apply a thin coat of gel medium to the surface where you’re applying the image.
- Place the image upside-down on the gelled surface.
- Smooth and flatten to remove air bubbles and excess gel, using either a roller and/or a flat edge.
- Allow glued image to completely dry. (You can hurry this process along with a hair-dryer.)
- Take a moist cloth, paper towel, or sponge, and lightly dampen the paper on the back of the image.
- Using a moist fingertip, make tiny circles on the back of the image until the paper begins to dissolve and peel away. Wet paper will come off in curly rolls which can be discarded. The idea is carefully remove the paper while leaving the image on the surface.
- Repeat step 9. Your image will grow progressively less “fuzzy” with each moist rubdown.
- Repeat step 9 again and again. It will take several passes to get the image fully cleared of paper backing, but when you’re done you’ll be left with a sharp image on your work surface.
- Finish with the clearcoat of your choice. (We’ve successfully applied clear enamel, polyurethane, and lacquer finishes to past projects.)

Laserjet Vs Inkjet
This process also works with an inkjet printer, but not as well. The ink is prone to smears and the images aren’t as sharp. Toner works better than ink for this application. Even an inexpensive laserjet printer will deliver an image with better clarity and durability. (This last one is important since you’ll need to give your image a rather intensive finger rubdown to remove the backing paper.)
My son and I chose the Samsung XPress Color laserjet primarily because of price and product size. The printer had a small footprint — it shares a shelf nicely with a Canon MX922 Inkjet — and produced amazingly sharp color images. Plus the replacement toner cartridges were reasonably priced. After all, buying a printer is easy...keeping it filled with ink and toner is where it gets expensive!
There’s Always Another Way
There is another method for transferring laserjet images to surfaces, but we can’t endorse it as “safe,” even while wearing a respirator.
Toner powder — generally tiny grains of plastic — is fused to paper via heat and pressurized rollers. Most home office laser printers fuse toner at temperatures around 400 °F. A hand-held home iron — the kind you use to get the wrinkles out of your shirt — reaches similar temperatures. (The linen setting on a typical household iron is approximately 450 °F.)
An adventurous — and some would say foolhardy— artist can “unfuse” the image from the paper to a certain degree and transfer it to wood with a hot iron and some elbow grease.
- Cut out your reverse-printed image, but leave yourself a bit of a border, especially a straight edge.
- Place the cut-out image upside down on the prepared surface and tape along the straight edge to hold it in place. This tape acts doubles as a hinge, allowing you to lift the image and inspect the area underneath, while keeping the image in place.
- Take your hot iron and iron that image onto the wood, using slow, even strokes and increasing pressure.
- Keep ironing for a full minute, and then check your work, carefully lifting the image like you would a book cover.
- The image on the wood will probably be faint. Carefully replace the image and keep ironing. Be careful not to scorch the wood of the project.
- The colors will deepen the longer you iron, but you generally won’t get the same bright, vibrant colors as the gel medium method mentioned above. The colors are more muted, almost watercolor-like.
- The main advantage of the iron-on method is a smooth, texture-free end result. The colors are really on the wood and not captured in a thin clear layer of gel medium.
- Honestly though, unless you’ve got professional respirators and a super well ventilated area, you’re better off sticking with the gel medium method. The image will be more colorful and vibrant. And you really don’t want to breathe in melted toner powder.
The Big Finish
It may take a while, but, with luck, my son will not only learn a viable skill, but our business will grow to a point where we can hire additional special needs employees to craft instruments along with us. I think of the young men and women my son plays hockey and baseball with—what kind of jobs will be available to them once they finish school? What about the kids in my son’s class? What about all the special needs kids he doesn’t go to school with? That’s a lot of young people who need a place to work. I want them to come make guitars and basses with my son and I, and fill the world with art and music!
Rob Errera and his son, Rocco, are the duo behind ItsYourGuitar.com

Rob Errera
Rob Errera is an award-winning journalist embedded in the world of printers and printing supplies. Rob has nearly two decades of experience writing about cutting edge technology, business trends, and the ever-evolving industry of printing.